Thursday, March 21, 2013

Altered Frame

Hello!

Another project to share.This is for a swap with a friend.We decided to do an altered frame swap.Any theme,any size.Here is my frame.


This was a plain frame made of handmade paper and chipboard I think.I used modelling paste and a stencil to give texture to it and then used various shades of pink to give an 'Ombre' effect(hardly visible in the picture).The birdcages are heat embossed with silver and then coloured with Worn lipstick.

Here are some closeups


I like how this turned out.Hope you like it too.

Cheers
Pallavi

Saturday, March 16, 2013

Banner Number 4

Hello!

This is banner number four.The person who is going to receive it actually likes Gothic stuff.I could not figure out what to do for that,so I went with the safer option of making something with the colours she likes.She likes the combination of pink and black,so thats what she gets,no matter how shocking a pink it is.:-)

The background is painted with acrylic paint and then I mixed black with my modelling paste and used the 'Art Is' stencil from the Crafter's workshop for the texture.After that it was pretty simple.Just used a bunch of diecuts from my stash and called it done.Even though the pink is super brigh,I still like this one.Hope you like it too!


Thanks
Pallavi

Friday, March 15, 2013

Banner number Three

Hi again,

Had enough of me?This is only the third one.Two more to go.lol.

This one is for a person who likes the Steampunk theme.This one scared me the most,since I don't understand it and have never done anything remotely Steampunky ever.This time I went with media other than paper.The background is black Gesso and I used a stencil and modeling paste for the Harlequin pattern.I then went over it with Vintage Photo distress ink.I also stamped a numbers stamp in white all over the banner.If you look carefully,maybe you will be able to see it.

I used the chipboard gears from Itsy Bitsy and painted them black.Then I used gold and bronze paint to make them look metallic.Did the same technique on the letter.The heart is a stamped and fussy cut image which I distressed with Vintage photo and so are the wings.There is a piece of wire mesh behind the letter.This was some metal netting that I had lying around after we changed the netting on our windows.I just went over it with the same paints that I used with the gears and letters.


I think that's about it.I have no idea whether this is truly steampunk or not, but this is all I could think of with the supplies in my stash.

Hope you like it.

Cheers
Pallavi
 

Thursday, March 14, 2013

Banner Number 2

Hello Again

This is the second banner I made.This one is for another person,who I don't know too well, so didn't know about her preferences.I chose to go with bright happy colours for this.The big rose is a vellum flower I made and then sprayed with Mister Huey's Boss lady spray,the doily is sprayed with Memento Fireworks spray in bamboo leaves.The chipboard lantern is from Itsy bitsy.The other flowers are I am roses flowers.There is a Martha stewart Punched border at the top and bottom and a blue PVC lace tape from Color Conceptions store.The cute chair stamp is also from the same store.I just stamped it on Orange paper.I coloured the chipboard lantern with Dried Marigold distress ink and also crackle accented the MDF letter and the lantern.


Hope you like it.On to banner number three now.:-)

Cheers,
Pallavi

Banners Galore!

Hey People,

I have been so busy lately with guests at home and then we got a new puppy,so crafting has almost come to a standstill.Why didn't anybody tell me that caring for a puppy is the same as caring for a baby!People with babies,do not get offended.

I am sleep deprived and all I do is mop,feed,attempt to train him and fail.:-)

Anyway there were some things that I had made before I got so busy and I am planning to share them one by one.The first thing was a bunch of name sign/banners/buntings ( don't know what to call them) for a few people as a part of a swap.Today I will share one of them.We had to make five,so be ready to see only banners ,banners and more banners in the next few posts.:-)

So here goes:

This one is for Gillian.I did not know her too well then, so I wasn't sure about her likes.I knew that she was open to anything, so I tried some colours which I never think of using.I quite like the result, if I may say so myself.Don't remember the paper collection.The diecuts are from various shops.The flowers and the fairy are from Itsy Bitsy.I coloured the chipboard fairy with black paint and then used sparkle dots, also from Itsy Bitsy on it.Love the effect!Complete supplies list below.


Hope you like it.

Banner : Handrawn and cut using chipboard from Itsy Bitsy
Wooden letter,Flowers and Chipboard fairy from Itsy Bitsy
LAce and Doily from my stash.

Cheers
Pallavi

Monday, March 4, 2013

Easter Card -Naughty Step Challenge Blog

Hello guys,

Today I wanted to share a card that I made for the March Challenge DT entry for The Naughty Step Challenge Blog .The challenge is Easter Bunny.All the DT members were provided with some image sheets which had to be used for their projects.I would have to be lying if I said that this was easy.I have never made an Easter card ad the image I chose was that of an egg!After much thinking this is what I came up with.(Today,I realized that I did not follow the theme of the challenge.There should have been an Easter bunny on my card!).Anyhow,this is what I made.


I have no clue why everything is looking crooked here.In reality its not.Yes,I checked.:-)

I hope you like this.If you would like to participate in the challenge,please head on over to the Naughty Step blog (link provided above).This month's prize is a CD and design sheets by Debbi Moore.

Hope to see you there.

Cheers
Pallavi

Love Tales Mini Album

Hello!

Needless to say,I have been missing in action again.I don't know why I do that!Inherent laziness I guess.Anyhow,today I wanted to share a mini album that I recently made for a close friend who was visiting me after a long time.

I have to tell you that mini albums are not my forte.They take me forever and most of that time is spent swearing and whining.This time though, I am very proud of myself.Not only did I attempt it,I also finished it in record time which is ..wait for it....ONE NIGHT!Quite an accomplishment for me.I am quite happy with how it turned out.Its fairly simple with not too many complicated inserts,but I think it has the right amount of interactive elements for a non scrapbooker like my friend.I am so happy I bought the stickers along with the paper.It was super easy to design everything and now I know why people go for the whole collections and not just paper.
.
Okay,so here is my album,Ta da! I called it "Love Tales"


The first spread.A pocket page on the right and A seven page booklet on the left.


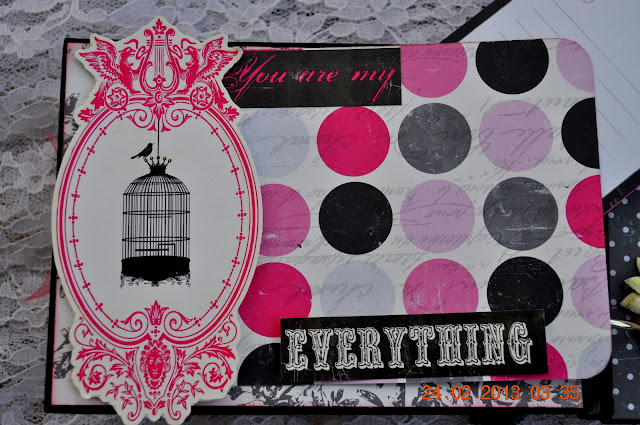
The next two -A working frame on the right and a foldout book on the left.


The next two pages have flaps on both sides which open up to reveal a couple of photo mats on each side.The front of the flap is decorated with cutouts from the paper and there are a couple of tags stuck in the pockets.


The next spread


Aaand......... the last spread.The right side has a flap and also has a pocket behind the flap.The last page is just a pocket page.


Hope you like this project.See you soon!

Supplies : Paper collection : Echo Park Be mine collection''
Papermania Rectangle chipboard album
Organza ribbon from the Color Conceptions Store
Flowers from Stash and Itsy Bitsy Boutique elements flowers.
Lace from my stash
Chipboard frame from Itsy Bitsy
Cheers
Pallavi
Related Posts Plugin for WordPress, Blogger...